Hello World Tutorial (using Steeltoe)
Prerequisites
This tutorial assumes RabbitMQ is downloaded, installed and running on
localhostand on the standard port (5672).In case you use a different host, port or credentials, connections settings would require adjusting.
Where to get help
If you're having trouble going through this tutorial you can contact us through Github issues on our Steeltoe Documentation Repository.
Introduction
RabbitMQ is a message broker; it accepts and forwards messages.
You can think of it as a post office; when you put the mail that you want sent in a post office box, you can be sure that the letter carrier will eventually deliver the mail to your recipient.
In this analogy, RabbitMQ is a post office, a post office box, and a letter carrier.
The major difference between RabbitMQ and the post office is that it doesn't deal with paper, instead it accepts, stores, and forwards binary blobs of data ‒ messages.
RabbitMQ, and messaging in general, use some jargon that you might not be familiar with:
Producing means nothing more than sending a message. A program that sends messages is a producer. In these tutorials we use the symbol
 to represent a producer.
A queue is the name for the post office box in RabbitMQ. Although messages flow through RabbitMQ and your applications, they can only be stored inside a queue. A queue size is only bound by the host's memory & disk limits, it's essentially a large message buffer.
Many producers can send messages that go to a single queue, and many consumers can try to receive messages from a single queue. We use the symbol
 to represent a queue.
Consuming has a similar meaning to receiving a message. A consumer is a program that mostly waits to receive messages. We use the symbol
 to represent a consumer
Note that the producer, consumer, and broker do not have to reside on the same host; indeed in most applications they don't.
An application can be both a producer and consumer, at the same time.
Overview
In this part of the tutorial we'll write two programs using the Steeltoe Messaging framework; a producer that sends a single message type, and a consumer that receives messages and prints them out as they are received. We'll gloss over some of the details in the Steeltoe API, concentrating on this very simple application just to get started. It's a "Hello World" of messaging.
In the diagram below, "P" is our producer and "C" is our consumer. The box in the middle is a queue - a message buffer that RabbitMQ keeps on behalf of the consumer.

Steeltoe Messaging Framework
RabbitMQ speaks multiple protocols and message formats. This tutorial and the others in this series use AMQP 0-9-1, which is an open, general-purpose protocol for messaging.
There are a number of different clients for RabbitMQ with each supporting many different languages and libraries.
In this tutorial, we'll be using .NET Core and the C# language. In addition we will be using the Steeltoe Messaging library to help simplify the code we write while creating our messaging applications in .NET.
We have also chosen to use Visual Studio 2022 to edit and build the project; but we could have just as easily chosen VSCode.
The source code of the tutorials is available online. You can either just run the finished tutorials or you can do the tutorials from scratch by following the steps outlined in each of tutorial writeups.
If you choose to start from scratch, open Visual Studio and create a new Console application using the VS2022 template:
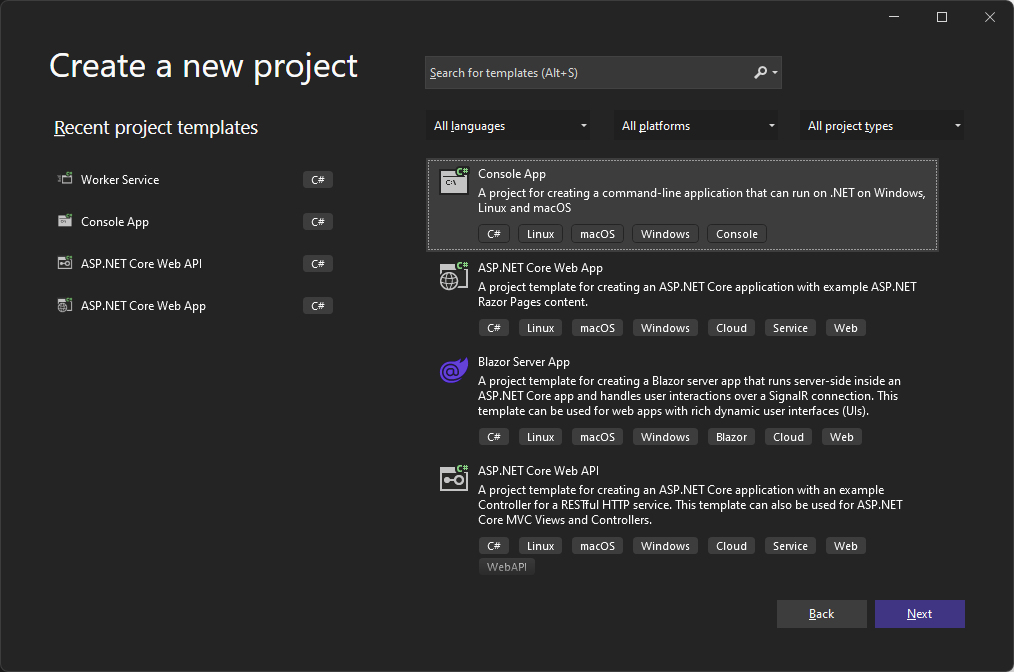
Name the project Receiver and select a directory location such as c:\workspace\Tutorials.
Choose a solution name of Tutorial1 and uncheck the Place solution and project in the same directory as you will be adding another project to this solution next.
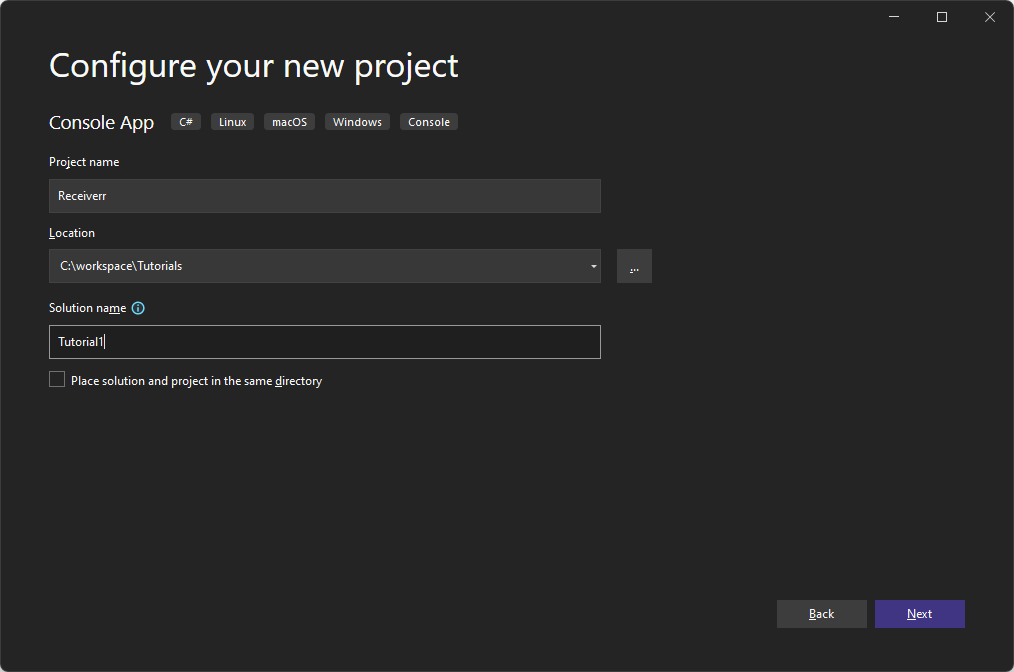
Next add another project to the solution. Choose a Worker Service project type this time:
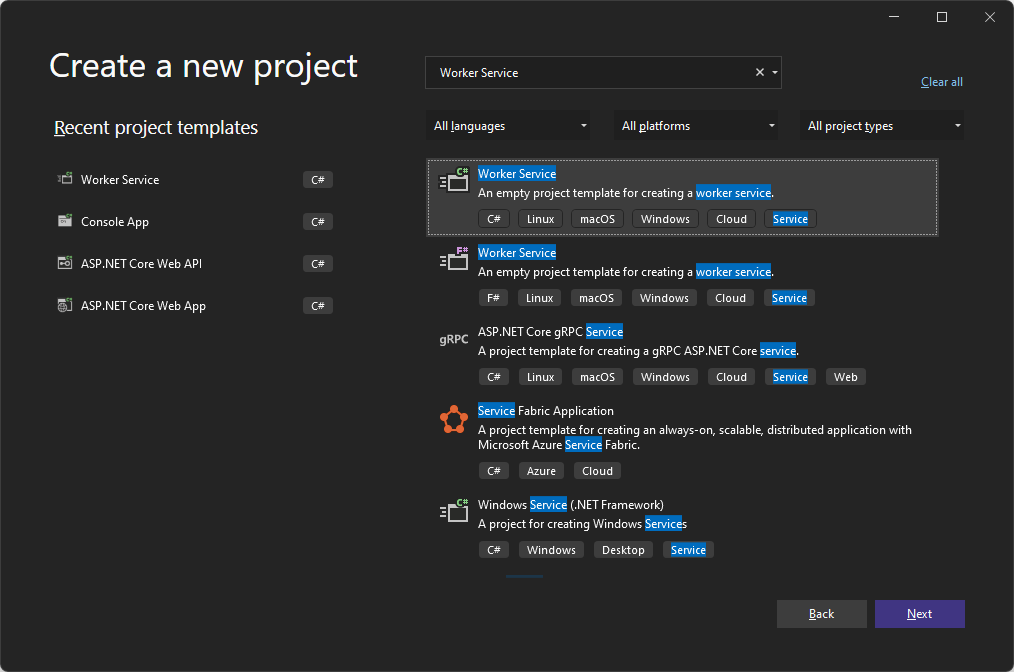
Name this project Sender and select the same directory location and solution name you picked earlier.
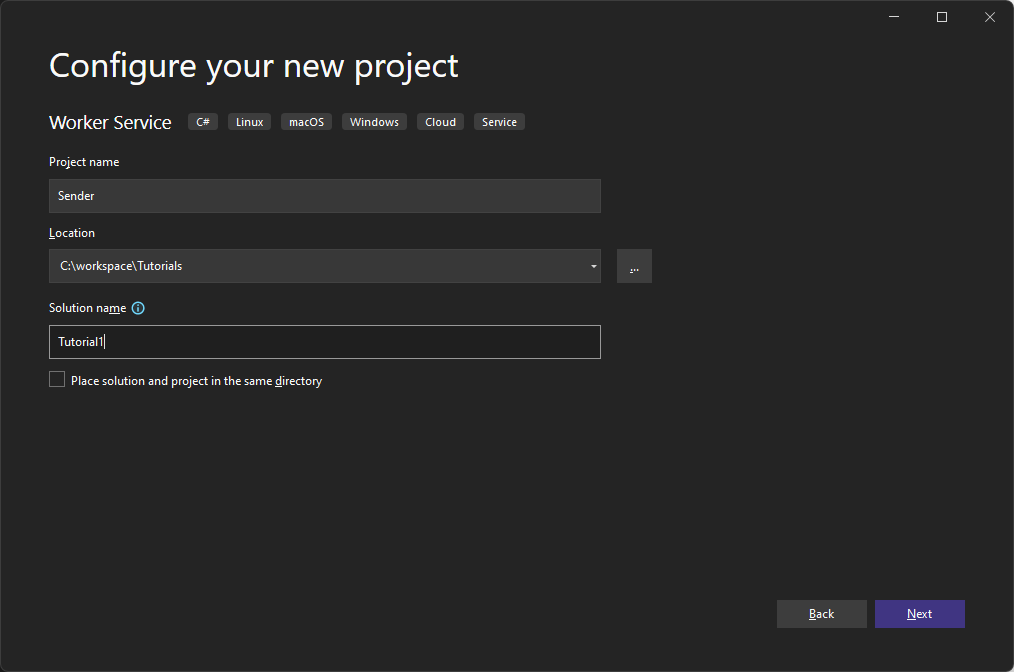
When you are done with the above, add a new class to the Receiver project.
Name this class Tut1Receiver; this will be the class we use to receive messages from the sender.
Next, in the Sender project, rename the Worker.cs file to Tut1Sender.cs.
Finally, in both of the projects .csproj files add the Steeltoe RabbitMQ Messaging package reference. Below is an example of the reference.
<PackageReference Include="Steeltoe.Messaging.RabbitMQ" Version="3.2.1" />
After these changes your solution should look something like the following:
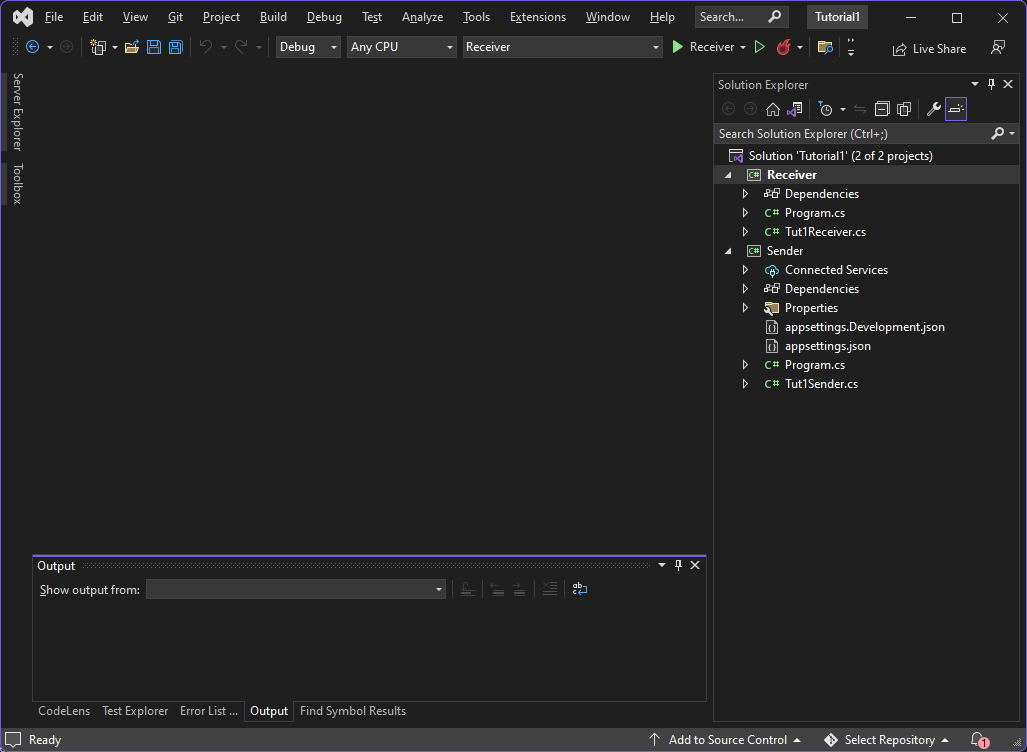
Configuring Steeltoe
Steeltoe Messaging offers numerous features you can use to tailor your messaging application. In this tutorial we only highlight a few that help us get our application up and running with a minimal amount of code.
First, Steeltoe RabbitMQ Messaging applications have the option of using the RabbitMQHost to setup and configure the .NET Host used to run the application. The RabbitMQHost is a simple host that is configured and behaves just like the .NET Core Generic Host but also configures the service container with all the Steeltoe components required to send and receive messages with RabbitMQ.
Specifically it adds and configures the following Steeltoe services:
RabbitTemplate- used to send (i.e. producer) and receive (i.e. consumer) messages.RabbitAdmin- used to administer (i.e. create, delete, update, etc.) RabbitMQ entities (i.e. Queues, Exchanges, Bindings, etc.). At application startup theRabbitAdminlooks for any RabbitMQ entities that have been added in the service container and attempts to define them in the broker.RabbitListener Attribute processor- processes allRabbitListenerattributes and createsRabbitContainers(i.e.consumers) for eachRabbitListener.Rabbit Container Factory- a component used to create and manage all theRabbitContainers (i.e.consumers) in the applicationRabbit Message Converter- a component used to translate .NET objects to a byte streams to be sent and received. Defaults to .NET serialization, but can be easily changed to usejson.Caching Connection Factory- used to create and cache connections to the RabbitMQ broker. All of the above components use the factory when interacting with the broker. By default it is configured to connect tolocalhostand port (5672).
Throughout the tutorials we will explain how all the above components come into play when building and running a messaging application.
To get started lets change the Program.cs file for the Receiver project. Specifically, lets use the RabbitMQHost.CreateDefaultBuilder(args) method to create a RabbitMQ host.
// Create a default RabbitMQ host builder
RabbitMQHost.CreateDefaultBuilder(args)
Next use the .ConfigureServices() method on the returned builder to further configure the services in the host.
First use the Steeltoe extension method .AddRabbitQueue(...) to add a Queue in the service container. We do this so that the RabbitAdmin will find it and at startup use it to create and configure the queue for us on the broker.
// Add queue to service container to be declared at startup
services.AddRabbitQueue(new Queue(QueueName));
Next add Tut1Receiver to the service container. Tu1Receiver is the component that will process messages received on the queue we configured above. This is done by adding Tut1Receiver as a singleton in the service container and then also configuring Steeltoe messaging to recognize it as a RabbitListener. As a result in the background, when the application starts up, the Steeltoe RabbitListener Attribute processor and the Rabbit Container factory mentioned above use this information to create a RabbitContainer (i.e. consumer) that consumes messages from the queue and invokes a method in the class (e.g. Tut1Receiver) to process it.
Note: At this point we have not explained how to tie together the queue,
Tut1Receiverand the method that gets invoked; that comes next.
// Add the rabbit listener component
services.AddSingleton<Tut1Receiver>();

// Tell Steeltoe the component is a listener
services.AddRabbitListeners<Tut1Receiver>();
When your done, the Program.cs file for the Receiver project looks as follows:
using Microsoft.Extensions.DependencyInjection;
using Microsoft.Extensions.Hosting;
using Steeltoe.Messaging.RabbitMQ.Config;
using Steeltoe.Messaging.RabbitMQ.Extensions;
using Steeltoe.Messaging.RabbitMQ.Host;

namespace Receiver
{
    internal class Program
    {
        internal const string QueueName = "hello";

        static void Main(string[] args)
        {
            RabbitMQHost.CreateDefaultBuilder(args)
                .ConfigureServices((hostContext, services) =>
                {
                    // Add queue to service container to be declared
                    services.AddRabbitQueue(new Queue(QueueName));

                    // Add the rabbit listener
                    services.AddSingleton<Tut1Receiver>();
                    services.AddRabbitListeners<Tut1Receiver>();
                })
                .Build()
                .Run();
        }
    }
}
Next change the Program.cs file for the Sender project.
In the senders Program.cs file use the RabbitMQHost.CreateDefaultBuilder(args) method to create a RabbitMQ host. Also add the Queue into the service container so it gets declared in the broker; this allows us to start either the sender or the receiver and regardless of which one starts first, the queue gets declared in the broker.
With these changes done, the Program.cs file for the Sender project looks as follows:
using Steeltoe.Messaging.RabbitMQ.Config;
using Steeltoe.Messaging.RabbitMQ.Extensions;
using Steeltoe.Messaging.RabbitMQ.Host;

namespace Sender
{
    public class Program
    {
        // The name of the queue that will be created
        internal const string QueueName = "hello";

        public static void Main(string[] args)
        {
            RabbitMQHost.CreateDefaultBuilder(args)
                .ConfigureServices(services =>
                {
                    // Add queue to service container to be declared
                    services.AddRabbitQueue(new Queue(QueueName));

                    services.AddHostedService<Tut1Sender>();
                })
                .Build()
                .Run();
        }
    }
}
Sending

Now there is very little code that needs to go into the Tut1Sender class. The sender leverages the SteeltoeRabbitTemplate, which is automatically added by RabbitMQHost to the service container, to send messages. We will inject it into the sender by adding it to the constructor of Tut1Sender.
Here is the code for the sender:
using Steeltoe.Messaging.RabbitMQ.Core;

namespace Sender
{
    public class Tut1Sender : BackgroundService
    {
        private readonly ILogger<Tut1Sender> _logger;
        private readonly RabbitTemplate _rabbitTemplate;

        public Tut1Sender(ILogger<Tut1Sender> logger, RabbitTemplate rabbitTemplate)
        {
            _logger = logger;
            _rabbitTemplate = rabbitTemplate;
        }

        protected override async Task ExecuteAsync(CancellationToken stoppingToken)
        {
            while (!stoppingToken.IsCancellationRequested)
            {
                await _rabbitTemplate.ConvertAndSendAsync(Program.QueueName, "Hello World!");
                _logger.LogInformation("Worker running at: {time}, sent message!", DateTimeOffset.Now);
                await Task.Delay(1000, stoppingToken);
            }
        }
    }
}
You'll notice that Steeltoe removes the typical boilerplate .NET code needed to send and receive messages leaving you with only the logic of the messaging application to be concerned about.
Steeltoe wraps the boilerplate RabbitMQ client classes with
a RabbitTemplate which can easily be injected into the sender. Also, the template has been
pre-configured with a connection to the broker using the Caching Connection Factory mentioned earlier.
All that is left is to create the .NET object we wish to send and invoke the template's
ConvertAndSend***() method passing in the queue name that
we defined earlier and the .NET object we wish to send.
Sending doesn't work!
If this is your first time using RabbitMQ and you don't see the "Sent" message then you may be left scratching your head wondering what could be wrong. Maybe the broker was started without enough free disk space (by default it needs at least 200 MB free) and is therefore refusing to accept messages. Check the broker log file to confirm and reduce the limit if necessary. The configuration file documentation will show you how to set
disk_free_limit.
Receiving
The receiver is equally simple. We annotate our receiver class method with RabbitListener attribute and pass in the name of the queue to the attribute. This ties the method to the queue such that all messages that arrive on the queue will be delivered to the method.
In this case we will define and annotate a void Receive(string input) method which has a parameter that indicates the type of object from the message payload we expect to receive from the queue. In our tutorial we will be sending and receiving strings via the queue. Behind the scenes, Steeltoe will use the Rabbit Message converter mentioned earlier to convert the incoming message payload to the type you defined in the Receive(..) method.
Here is the code for the receiver:
using Microsoft.Extensions.Logging;
using Steeltoe.Messaging.RabbitMQ.Attributes;

namespace Receiver
{
    public class Tut1Receiver
    {
        private readonly ILogger _logger;

        public Tut1Receiver(ILogger<Tut1Receiver> logger)
        {
            _logger = logger;
        }

        [RabbitListener(Queue = Program.QueueName)]
        public void Receive(string input)
        {
            _logger.LogInformation($"Received: {input}");
        }
    }
}
Putting it all together
We must now build the solution.
cd tutorials\tutorial1
dotnet build
To run the receiver, execute the following commands:
# receiver

cd receiver
dotnet run
Open another shell to run the sender:
# sender

cd sender
dotnet run
Listing queues
You may wish to see what queues RabbitMQ has and how many messages are in them. You can do it (as a privileged user) using the
rabbitmqctlCLI tool:sudo rabbitmqctl list_queuesOn Windows, omit the sudo:
rabbitmqctl.bat list_queues
Time to move on to tutorial 2 and build a simple work queue.